10 Hauntingly Beautiful Halloween Nail Ideas for 2025
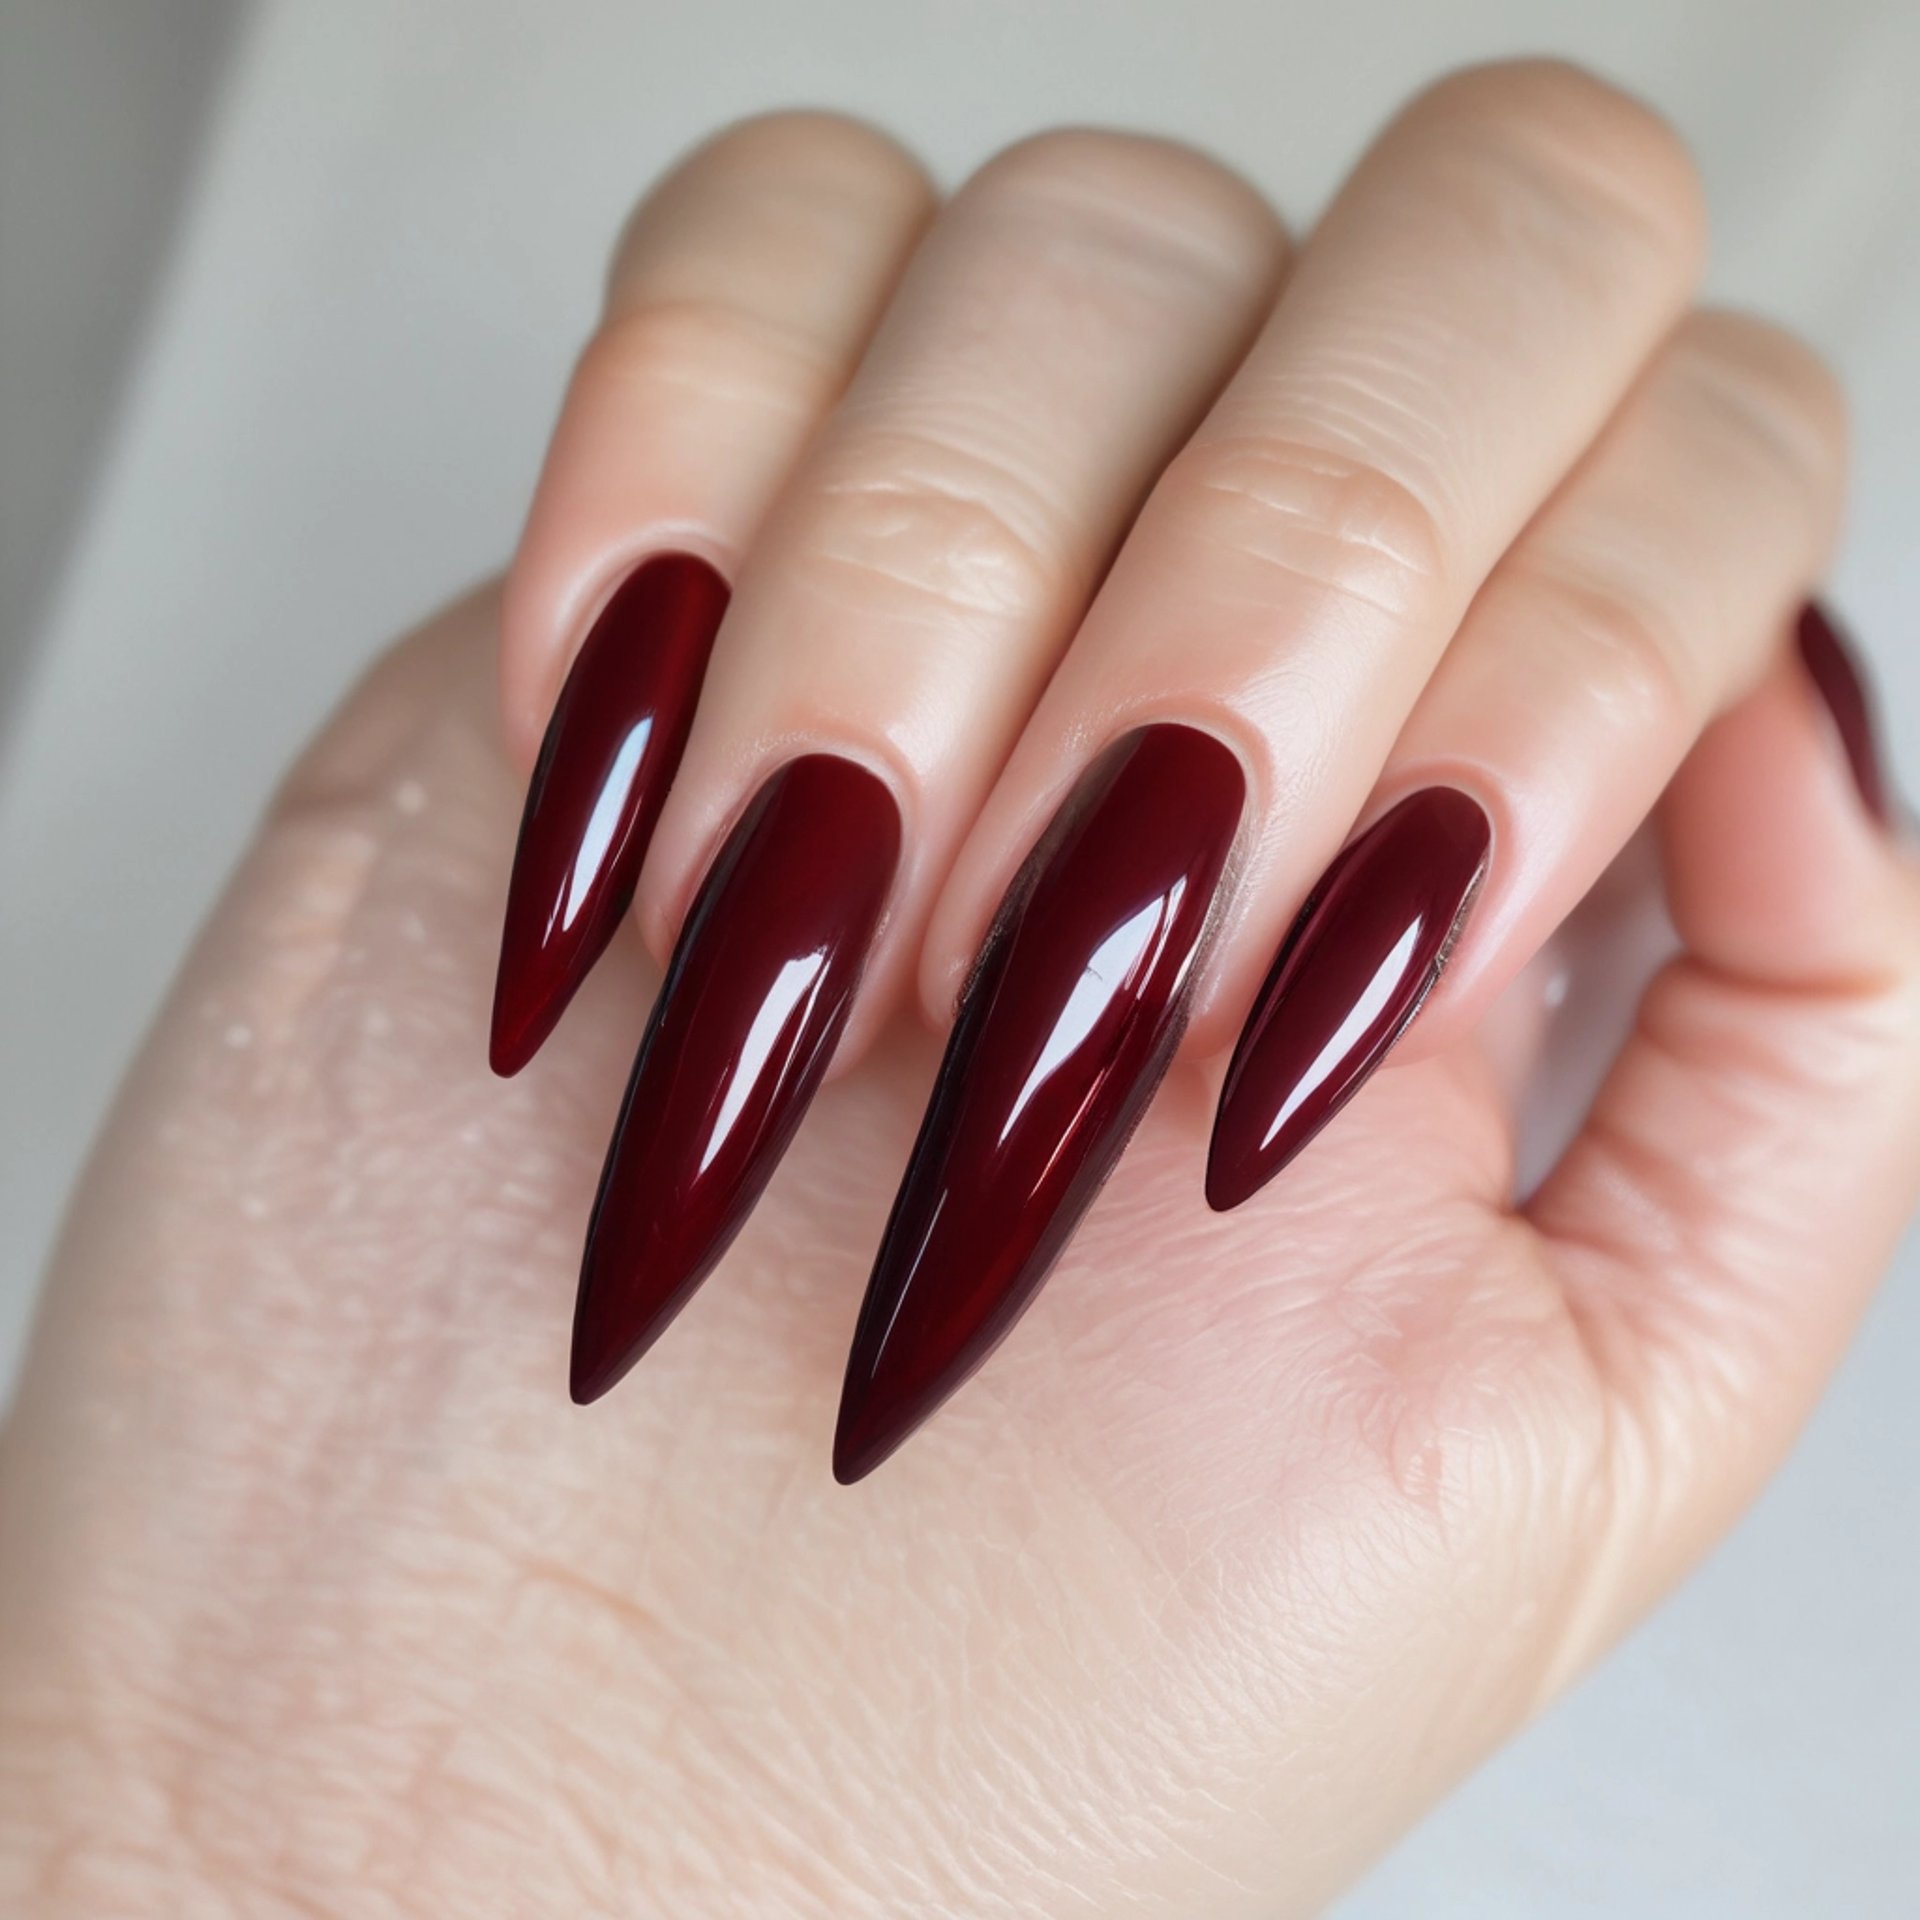
1. Vampire's Kiss Ombre
Nothing says gothic romance quite like a dramatic ombre fade. This look is seductive, bold, and utterly timeless for Halloween. Imagine deep, blood-red melting into an inky black – pure vampire glamour!
The Vibe: Gothic Glamour, Seductive, Eternal Night.
What You'll Need: Black polish, Deep Blood Red polish, a makeup sponge or ombre brush, and a glossy top coat.
Step-by-Step:
Black Base: Apply two coats of black polish as your base and let dry completely.
Sponge Time: On a makeup sponge, apply a stripe of red next to a stripe of black.
Dab & Blend: Lightly dab the sponge onto your nail, focusing the red near the tip. Continue dabbing and moving slightly toward the center until the colors blend seamlessly.
Seal It: Clean up the excess polish around your skin and finish with a high-shine top coat to make that "blood" shimmer.
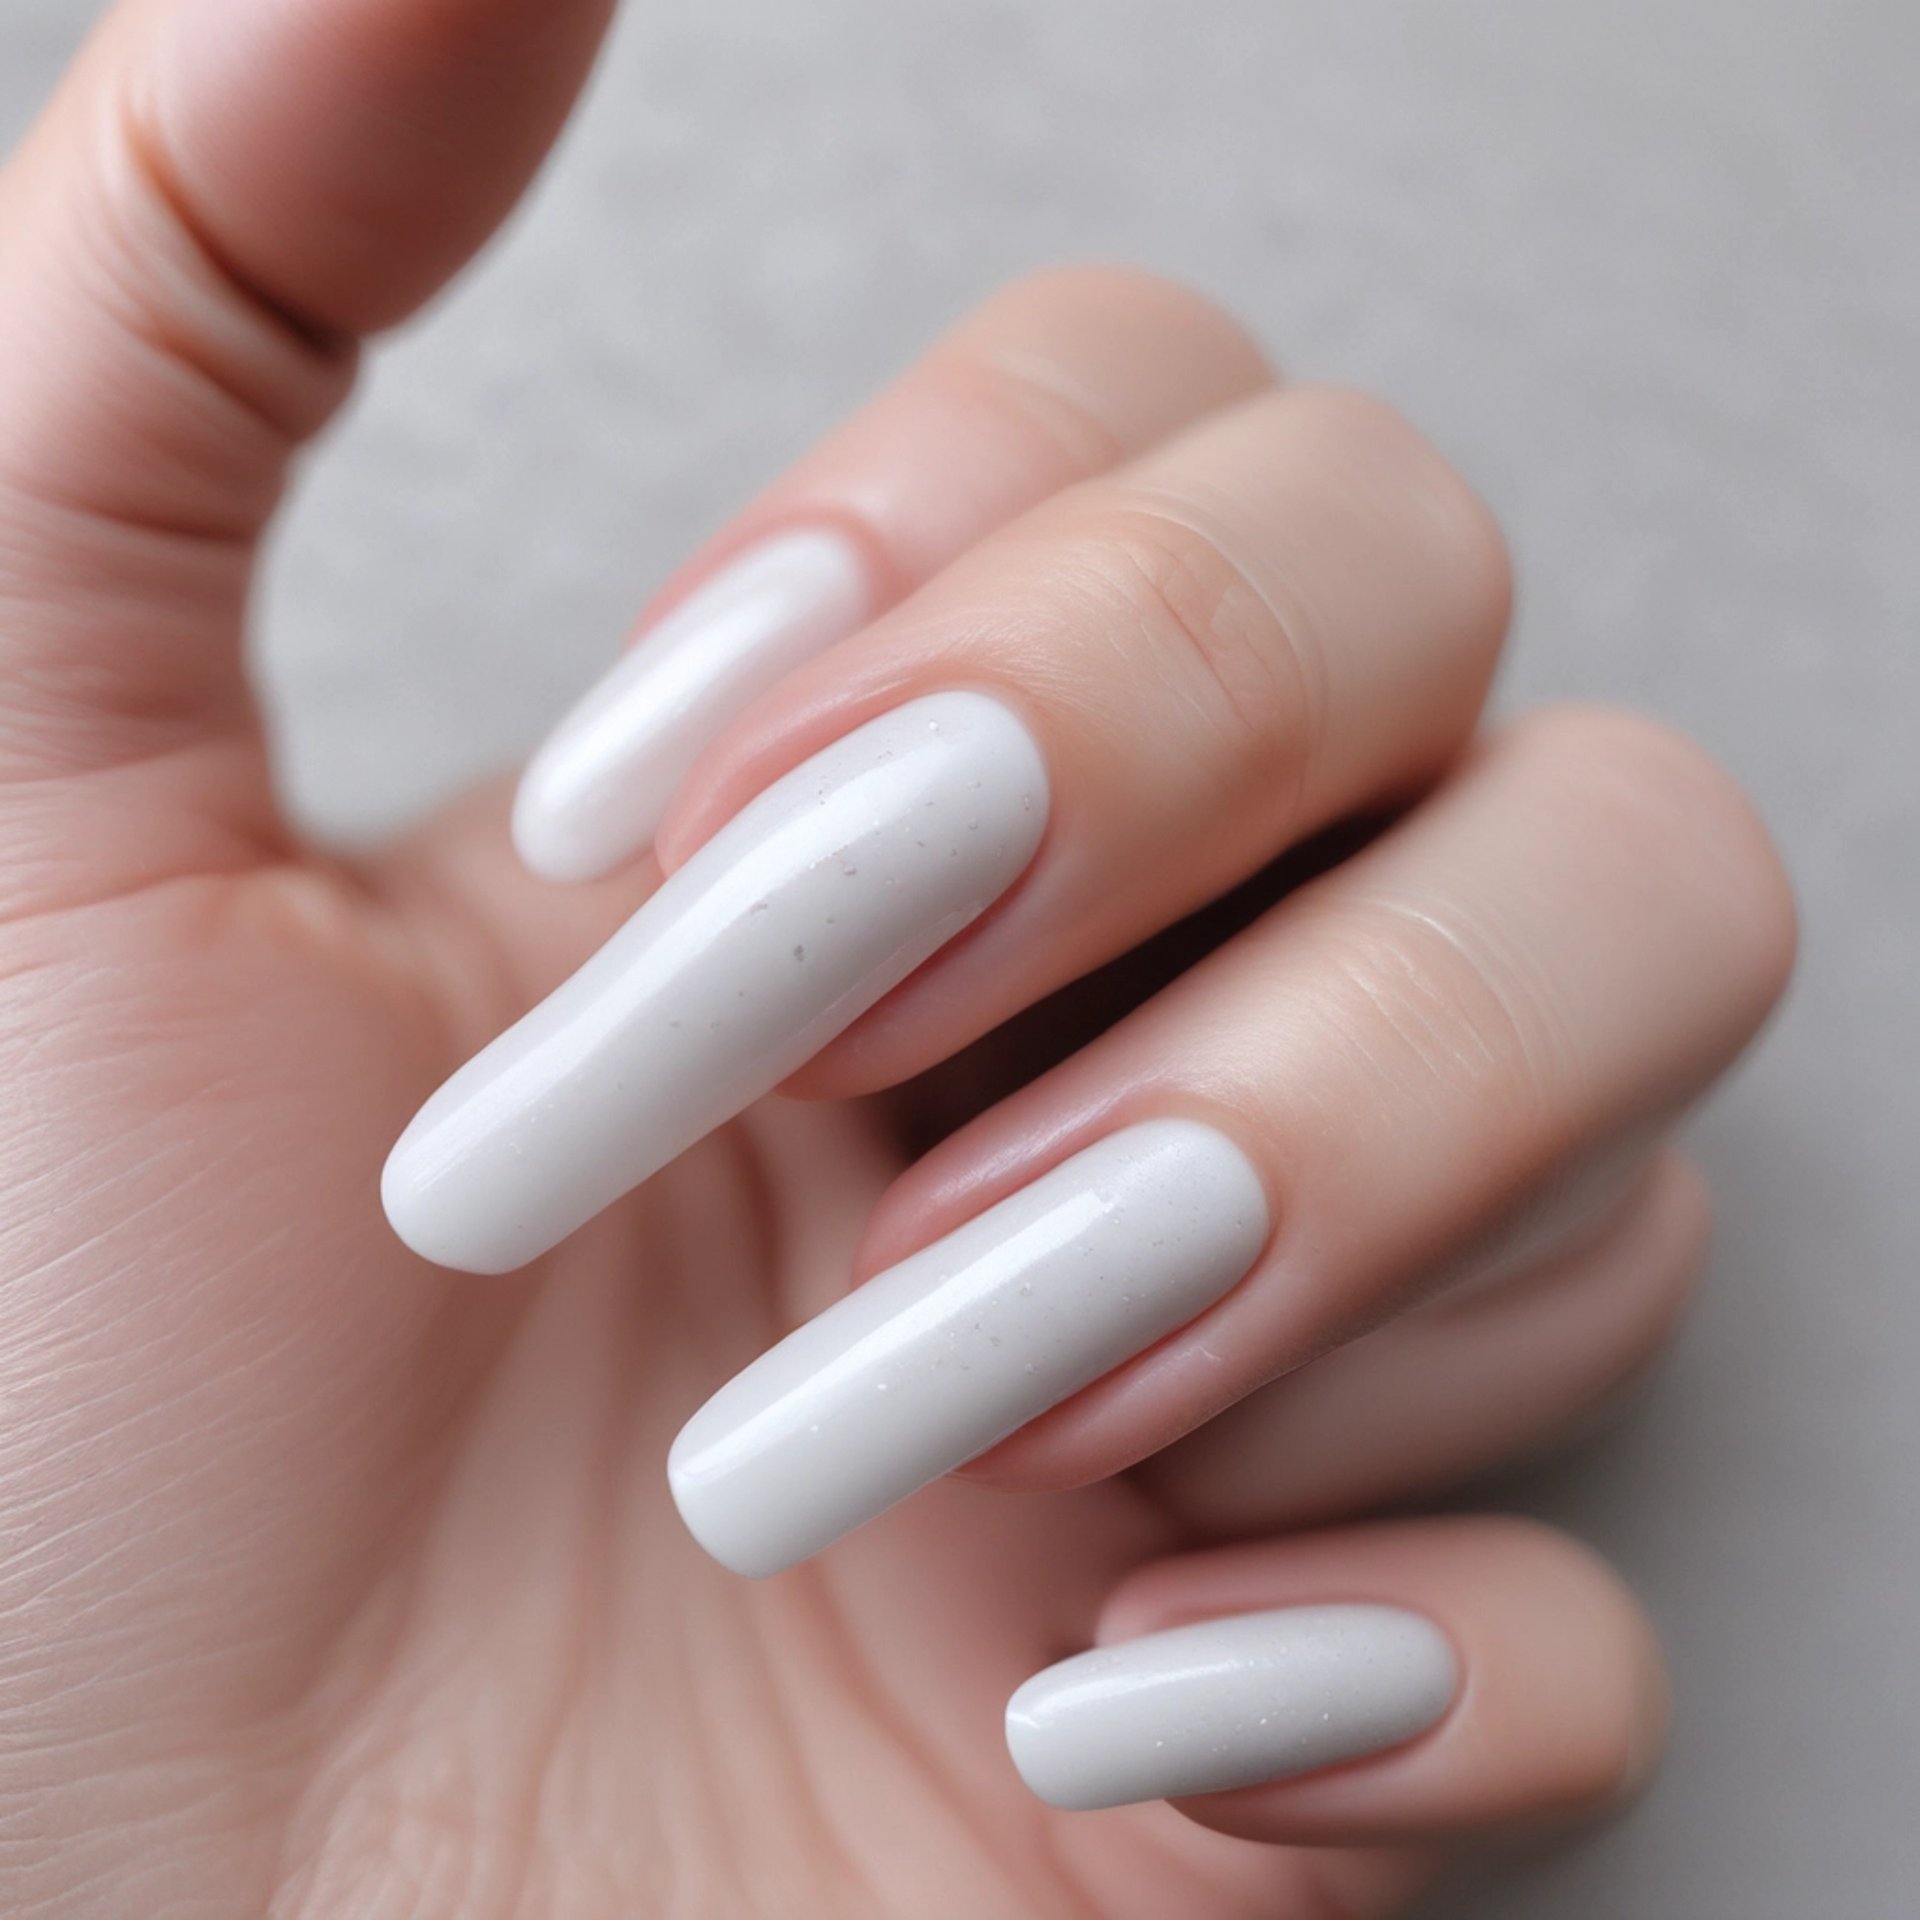
2. "Glazed Donut" Ghosties
The glazed trend isn't going anywhere, but we're giving it a ghostly upgrade! This is the perfect look if you want something spooky yet incredibly adorable and easy to wear.
The Vibe: Cute & Ethereal, Minimalist Spook.
What You'll Need: Sheer milky white or nude polish, White polish, Chrome/Pearl powder, and a dotting tool.
Step-by-Step:
Base Coat: Apply your sheer milky white or nude base. Cure/dry.
The Ghost: Dip your dotting tool into the solid white polish and create a large, wobbly circle near the tip. Drag the polish down slightly to create a wavy 'tail.' Cure/dry.
Glaze: Rub a tiny amount of chrome or pearl powder over the entire nail to get that iconic glazed shine.
Finish: Add two small black dots on the white shapes for eyes using a fine detail brush. Top coat and cure
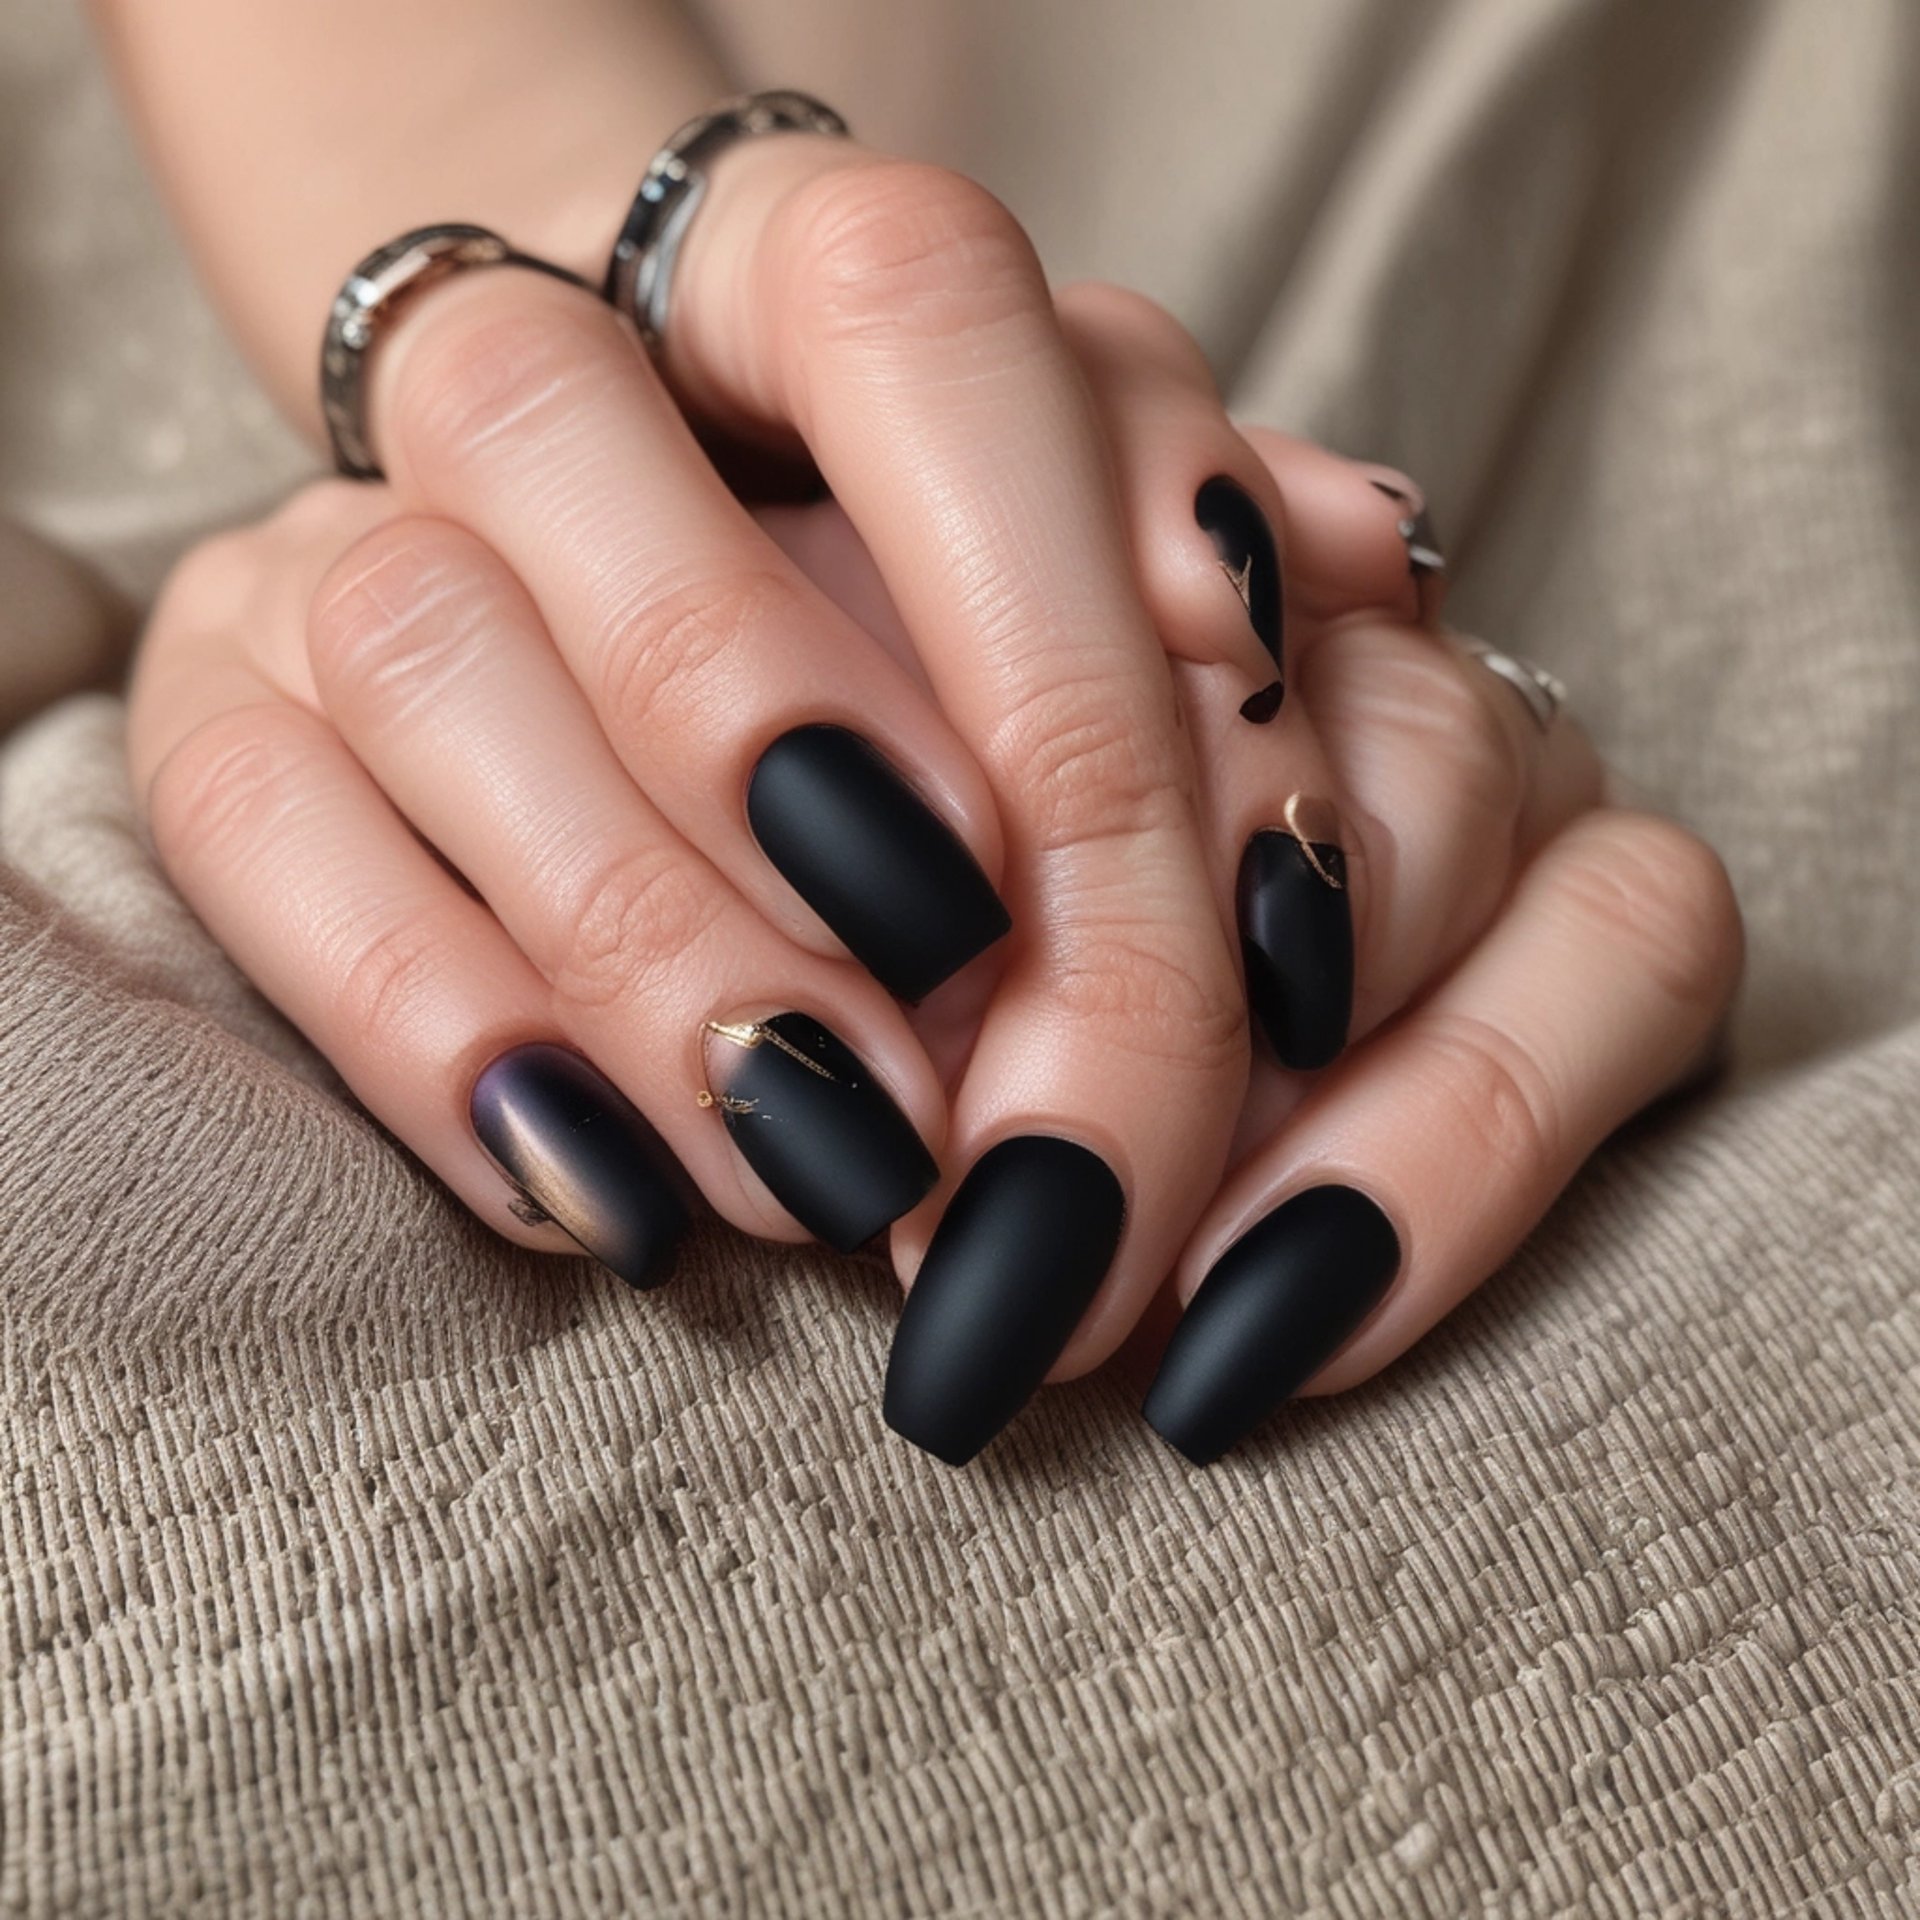
3. Matte Black Witchy Tips
Sometimes, less is truly more. This elegant design uses negative space and a minimalist metallic accent to evoke a powerful, yet understated, witchy energy.
The Vibe: Elegant Minimalism, Understated Power.
What You'll Need: Matte black polish, a very fine detail brush, and metallic gold or silver polish.
Step-by-Step:
Matte Base: Apply two coats of matte black to four of your five nails.
The Accent: For the accent nail (ring or pointer), apply a clear base coat.
Crescent Moon: Use the metallic polish and a fine brush to paint a delicate crescent moon shape right at the base of the nail (the cuticle area) or a tiny, simple star.
Finish: Apply a glossy top coat over the accent nail to make the gold pop, and a matte top coat over the other four black nails.
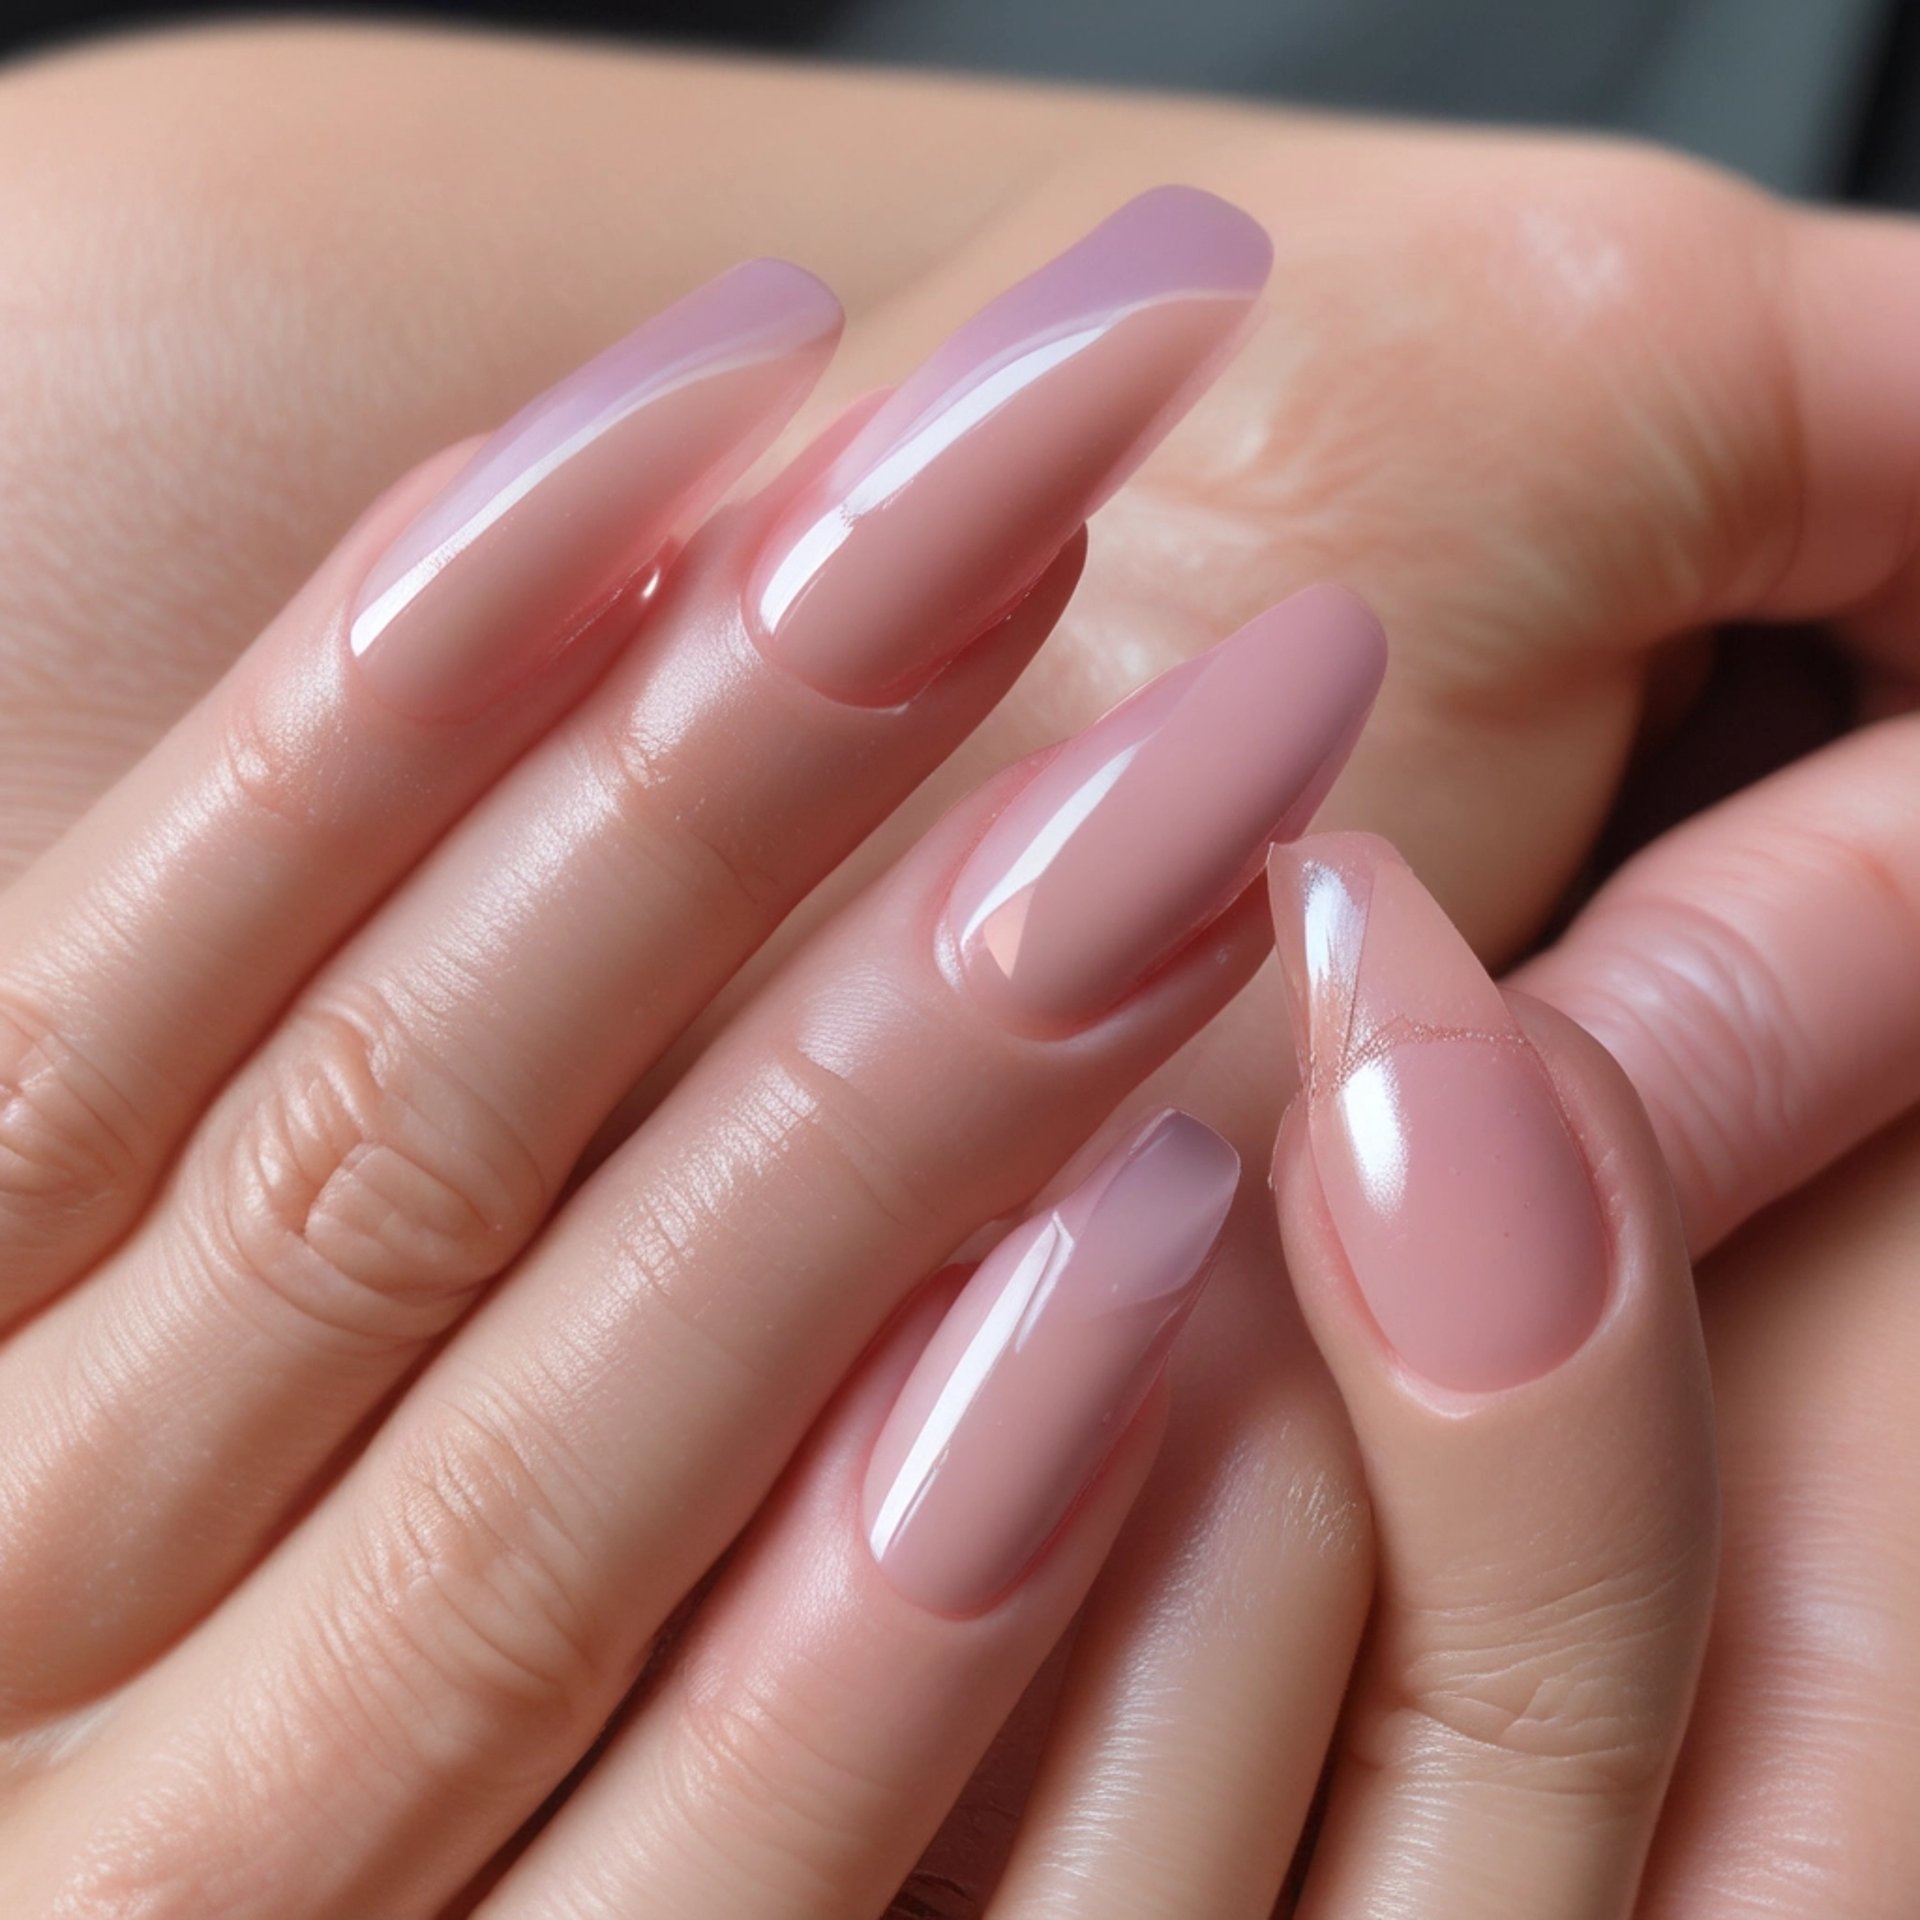
4. 3D Bloody Tips
For those who love a bit of texture and drama, the 3D 'blood drip' effect is surprisingly chic when done on a long, sculpted tip. It looks like fresh, glossy blood running down your sharp claws.
The Vibe: Subtle Gore, High Fashion, Sculpted Drama.
What You'll Need: Nude or sheer pink base polish, thick jelly red polish or 3D builder gel, and a fine dotting tool.
Step-by-Step:
Base: Apply two coats of a sheer nude polish. Cure/dry.
The Drips: Starting at the tip, use the red jelly polish or 3D gel to create thick, rounded pools of "blood."
The Cascade: Use a dotting tool to drag the red polish downwards in two or three drips of varying lengths, making sure the polish remains thick for a 3D effect.
Set & Shine: Cure the 3D gel well. Finish with a high-gloss top coat just on the red areas (or the whole nail if you want maximum shine).
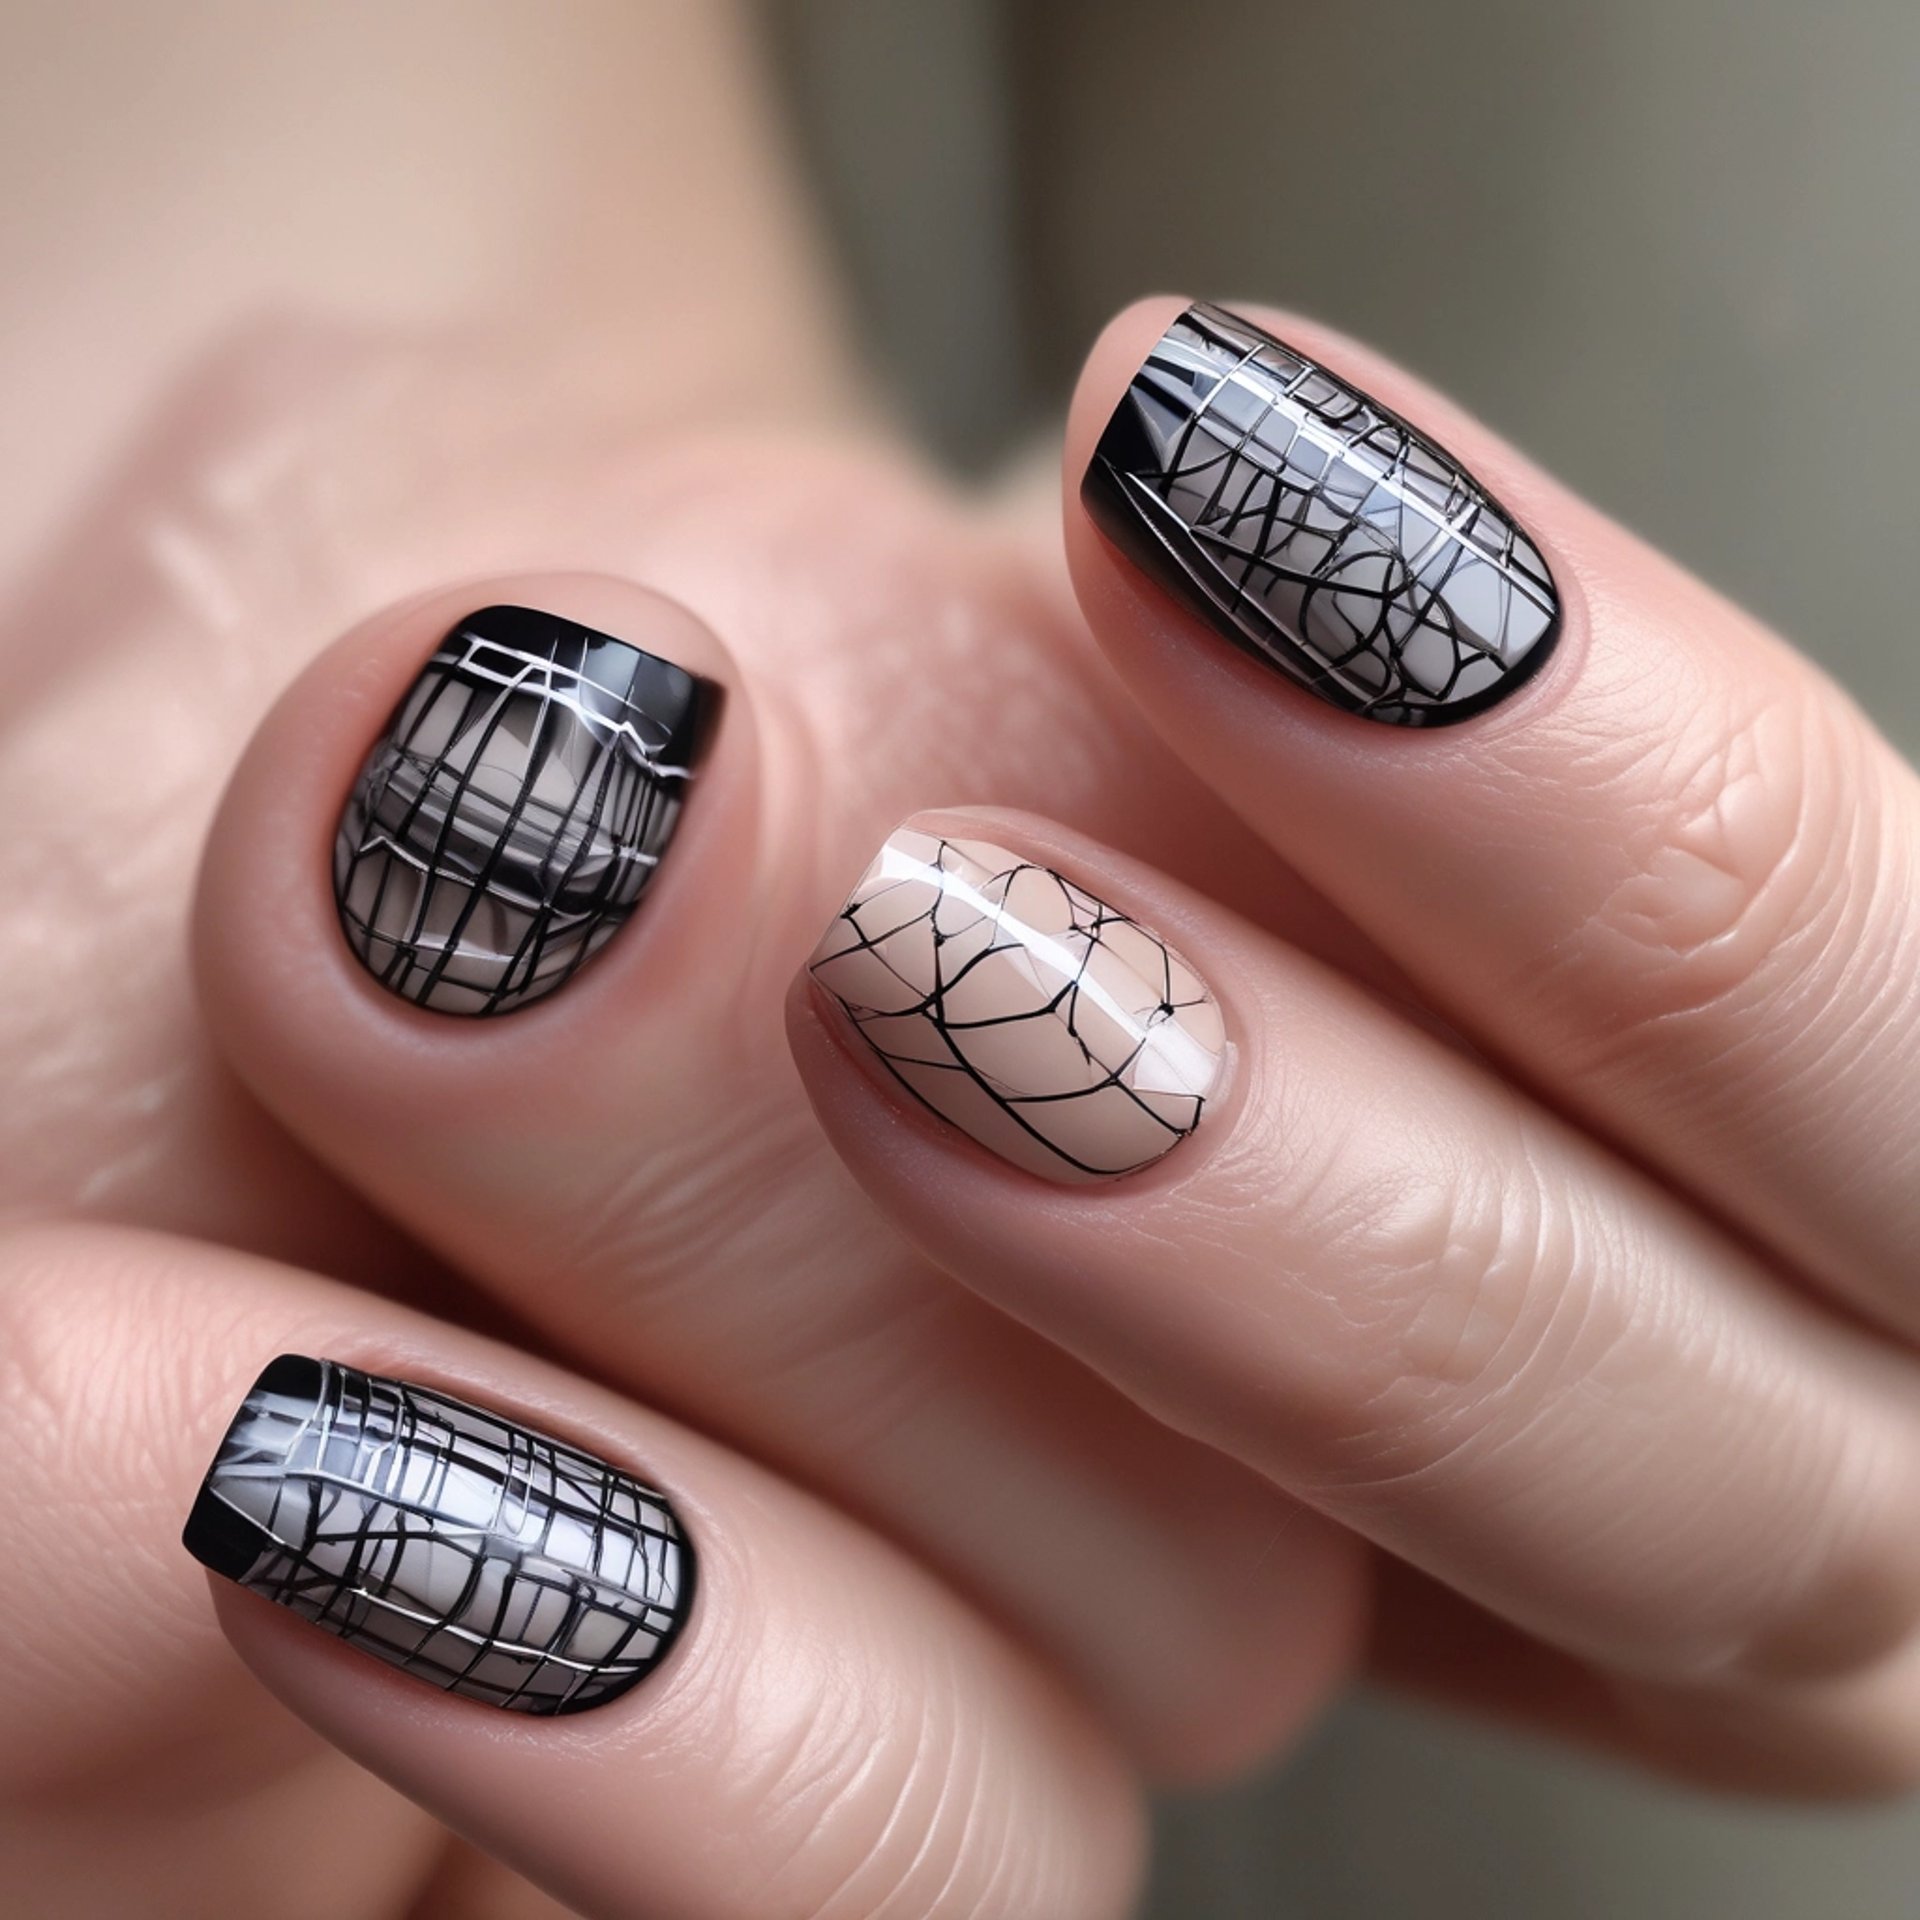
5. Cobweb French Mani
A perfect, easy-to-DIY design that brings spooky flair to a classic look. It’s ideal for the office, parties, and everything in between.
The Vibe: Sophisticated Spook, Daily Wearable.
What You'll Need: Nude base polish, black polish, white polish (or nail art liner), and a very fine detail brush.
Step-by-Step:
Base: Apply a smooth, clear or nude base coat. Cure/dry.
French Tip: Apply a clean black French tip to all nails.
The Web: On one accent nail, use the fine detail brush and white polish to draw two or three straight lines radiating from the tip.
The Strings: Connect the lines with small, curved 'smile' lines to complete the web effect.
Seal It: Top coat everything with a glossy finish.
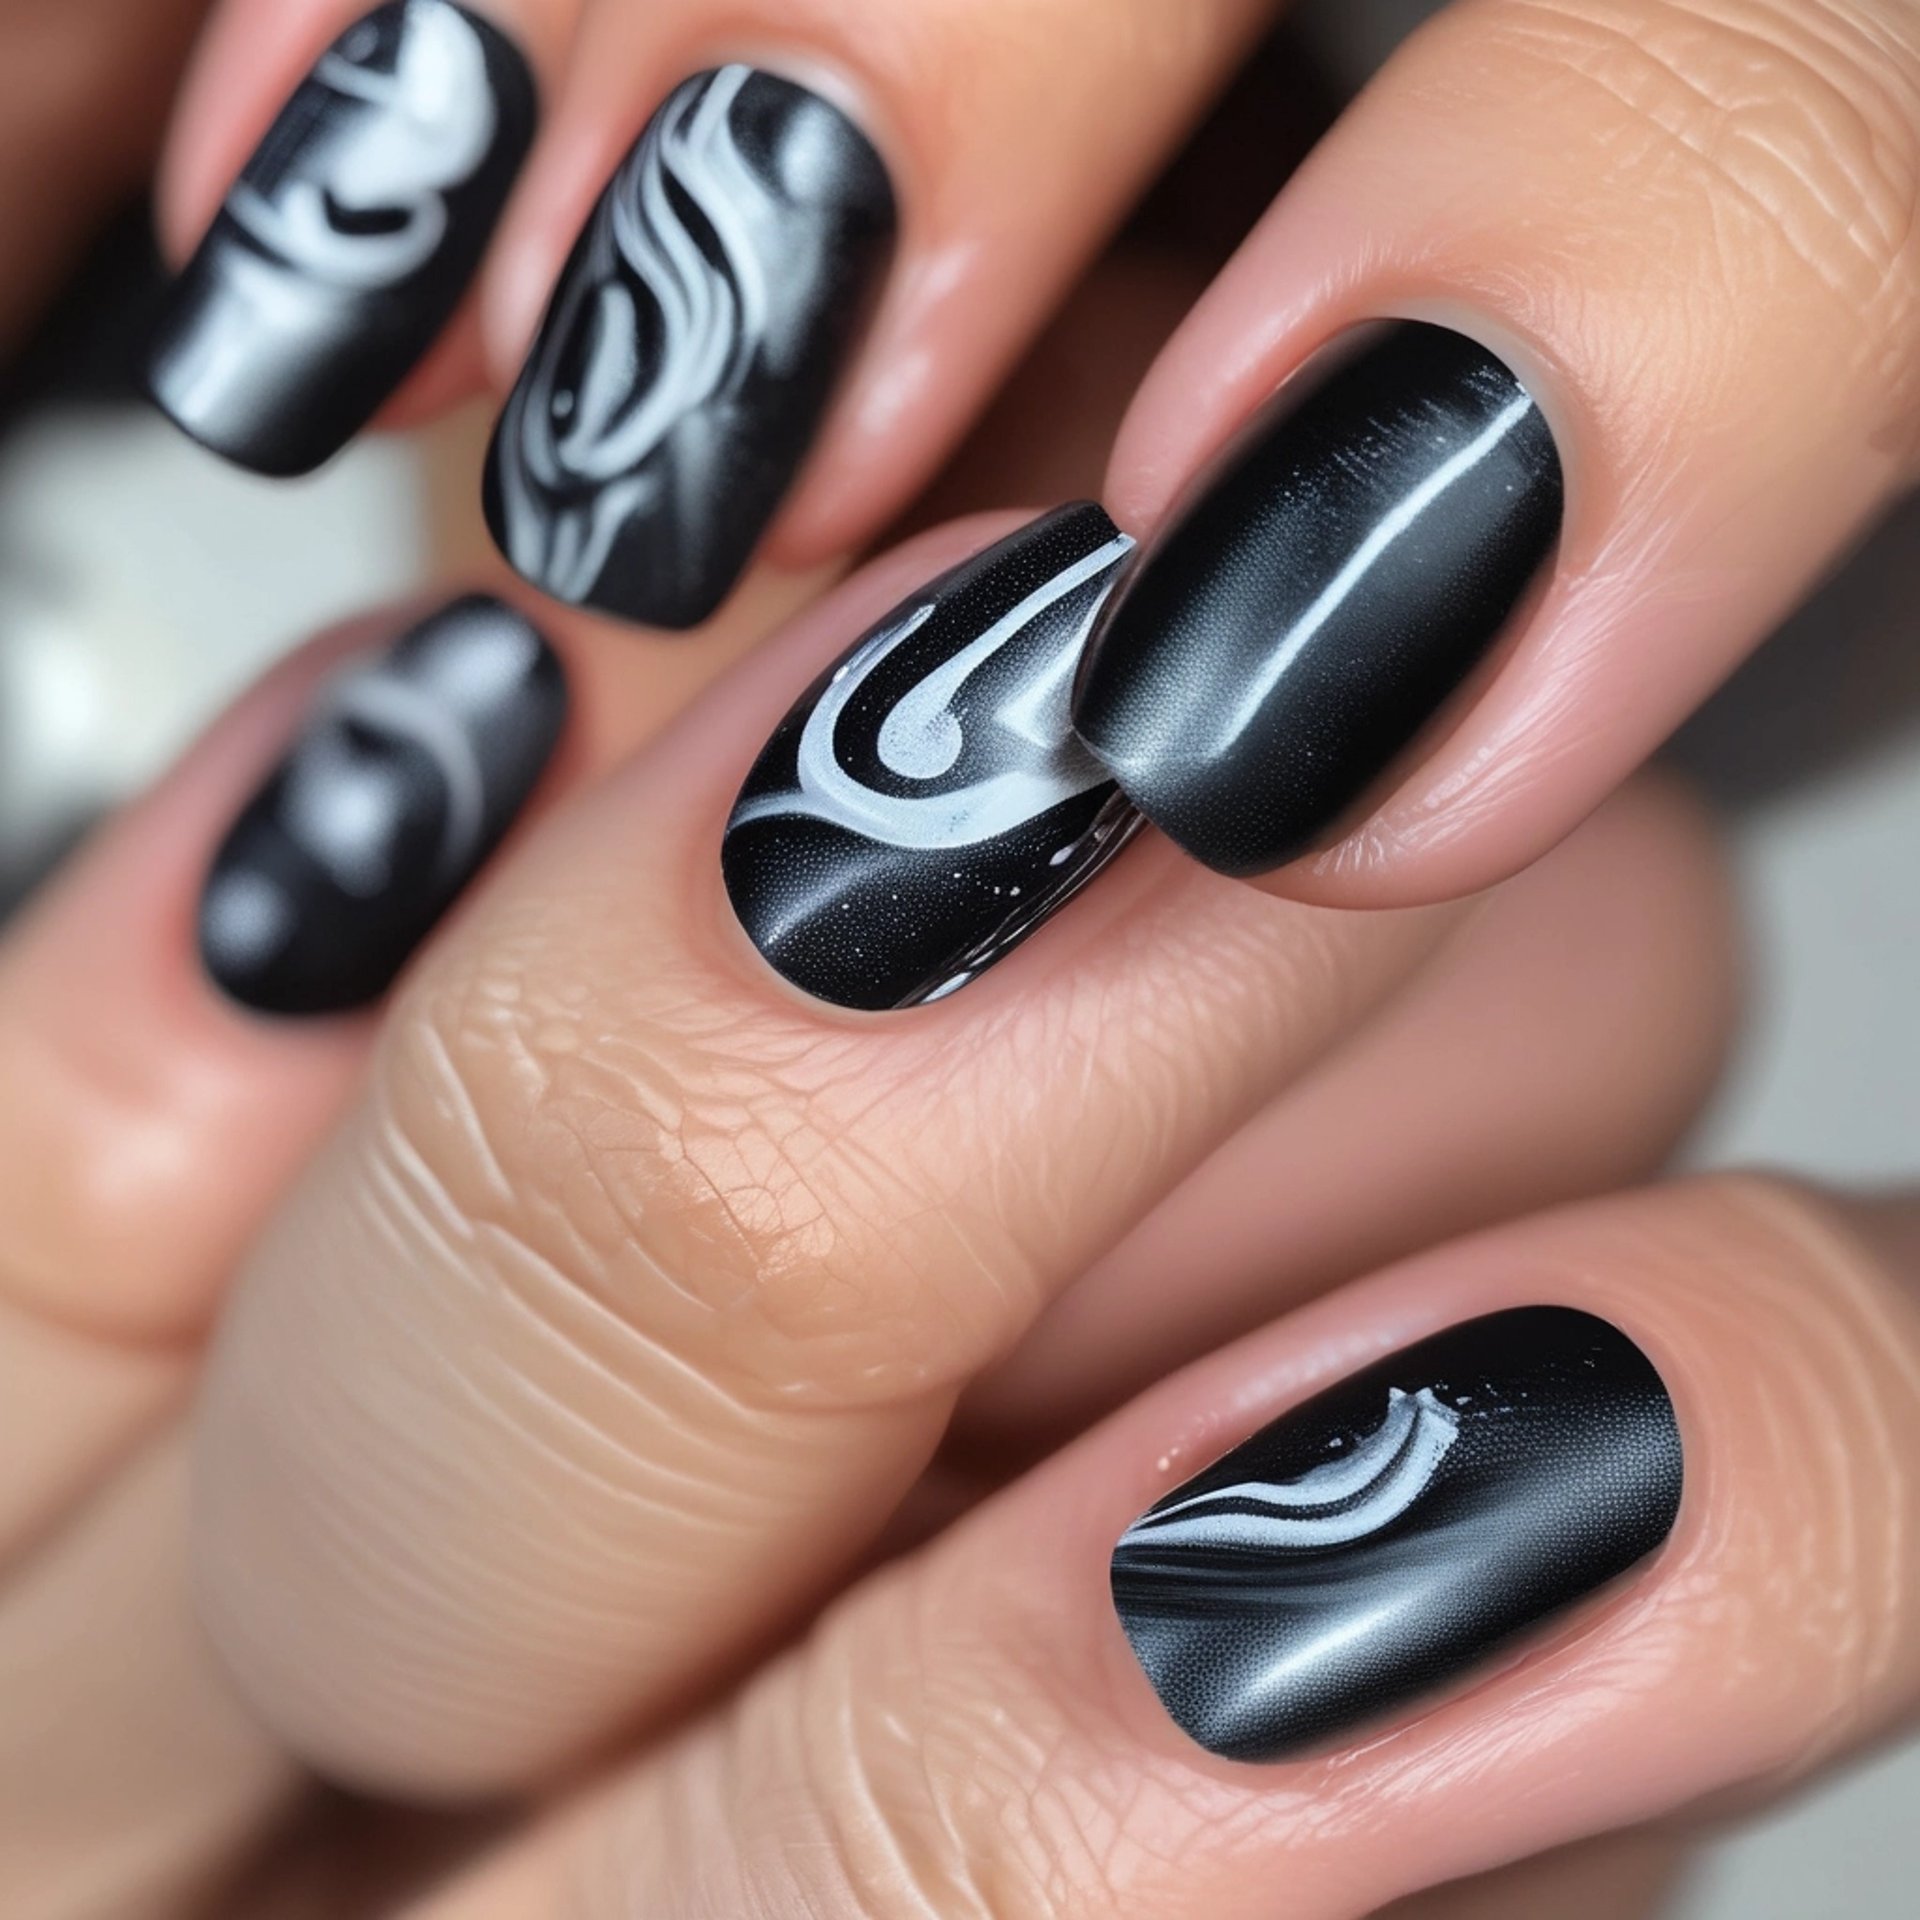
6. Ethereal Smoke Effect
This mysterious design is less about a specific motif and more about atmosphere. It captures the look of curling, otherworldly smoke rising from a cauldron or a misty grave.
The Vibe: Moody, Abstract, Otherworldly.
What You'll Need: Black polish, sheer gray or white polish, isopropyl alcohol (optional, for blending), and a matte top coat.
Step-by-Step (Gel recommended):
Base: Apply a thin coat of black gel and cure.
The Swirl: Apply a layer of sheer top coat (don't cure!). Use a fine brush to swirl tiny amounts of gray/white and black gel into the wet top coat. Tip: You can lightly dab the brush with alcohol for a more hazy, diffused look.
Set the Smoke: Cure immediately once the effect looks right.
Finish: Finish with a matte top coat to give the design a dry, atmospheric texture.
7. Pumpkin Spice Aura
Aura nails are a huge trend, and they translate perfectly to autumn by swapping bright colors for cozy, seasonal shades of orange and rust.
The Vibe: Warm & Trendy, Cozy Autumn.
What You'll Need: Nude or cream base, a bright orange polish, and a rust-colored or deep red polish.
Step-by-Step:
Base: Apply two coats of your nude or cream base polish. Cure/dry.
The Glow: Apply a large dot of the bright orange polish in the center of the nail.
The Aura: While the orange is wet, gently surround it with a ring of the rust-colored polish. Use a clean, dry brush or a small sponge to gently blend the two colors outward from the center, creating a soft, glowing halo effect.
Seal It: Top coat and cure.
8. Mummy Wrap Chrome
A modern, edgy take on the classic mummy. We're using the popular chrome finish to add a high-end, futuristic feel to this ancient character.
The Vibe: Modern Creepy-Cute, High-Shine Edge.
What You'll Need: Beige or light gray base, black polish, white polish, and silver chrome powder.
Step-by-Step (Gel required for chrome):
Base: Apply beige or light gray gel base and cure.
The Wraps: Using a thin detail brush and white polish, paint irregular, slightly messy horizontal and diagonal lines to mimic wrapping. Cure.
Chrome Magic: Rub the silver chrome powder lightly over the white lines only to make the wraps metallic.
Eyes: Use a dotting tool and black polish to place two tiny, slightly crossed eyes peeking out from the wraps on one nail. Top coat and cure.
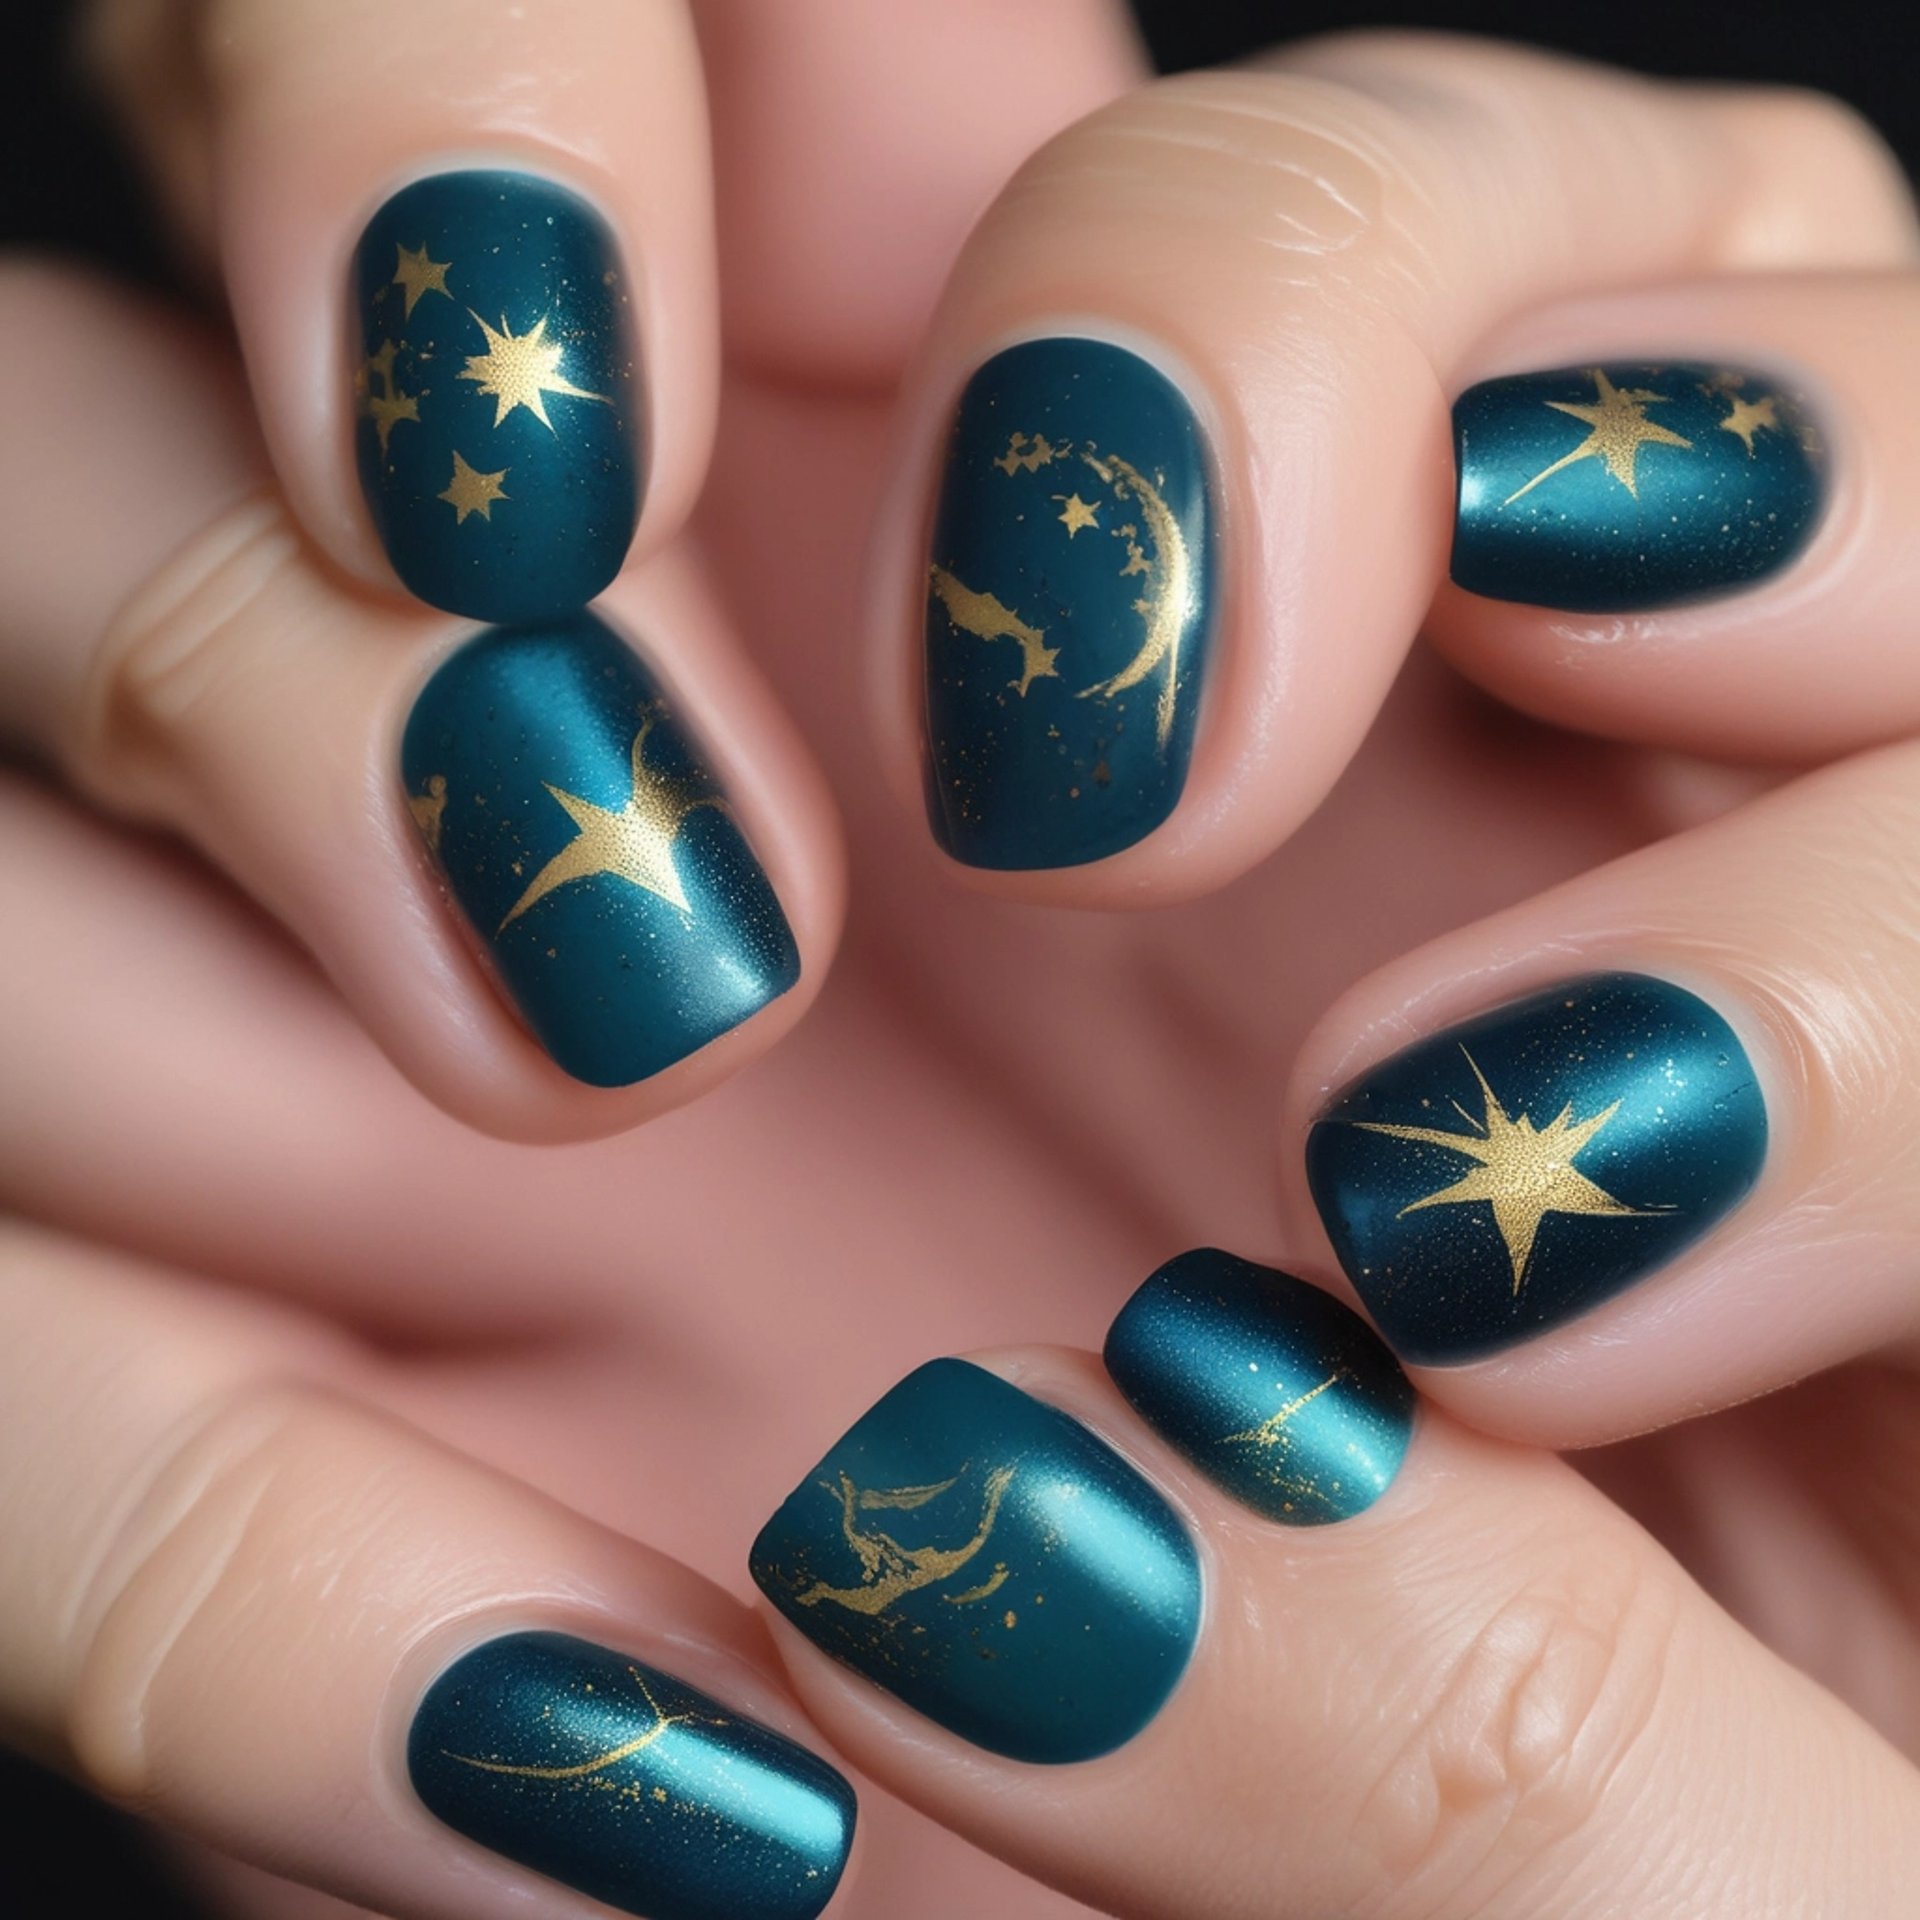
9. Celestial Sorceress
Perfect for channeling your inner witch without resorting to typical tropes. This design is all about the night sky, moon cycles, and mystical energy.
The Vibe: Mystical & Chic, Deep Night Magic.
What You'll Need: Deep midnight purple or teal polish, metallic gold foil/flakes, and tiny crescent moon or star decals.
Step-by-Step:
The Deep Night: Apply two coats of the deep purple or teal polish. Cure/dry.
Foil Flakes: While the second coat is tacky, press small, irregular pieces of gold foil onto the nail, scattered like distant stars.
The Heavens: Apply one or two small, intricate metallic decals (a tiny moon, a star cluster, or a single eye symbol).
Seal It: Finish with a glossy top coat to seal in the shine and deepen the color.
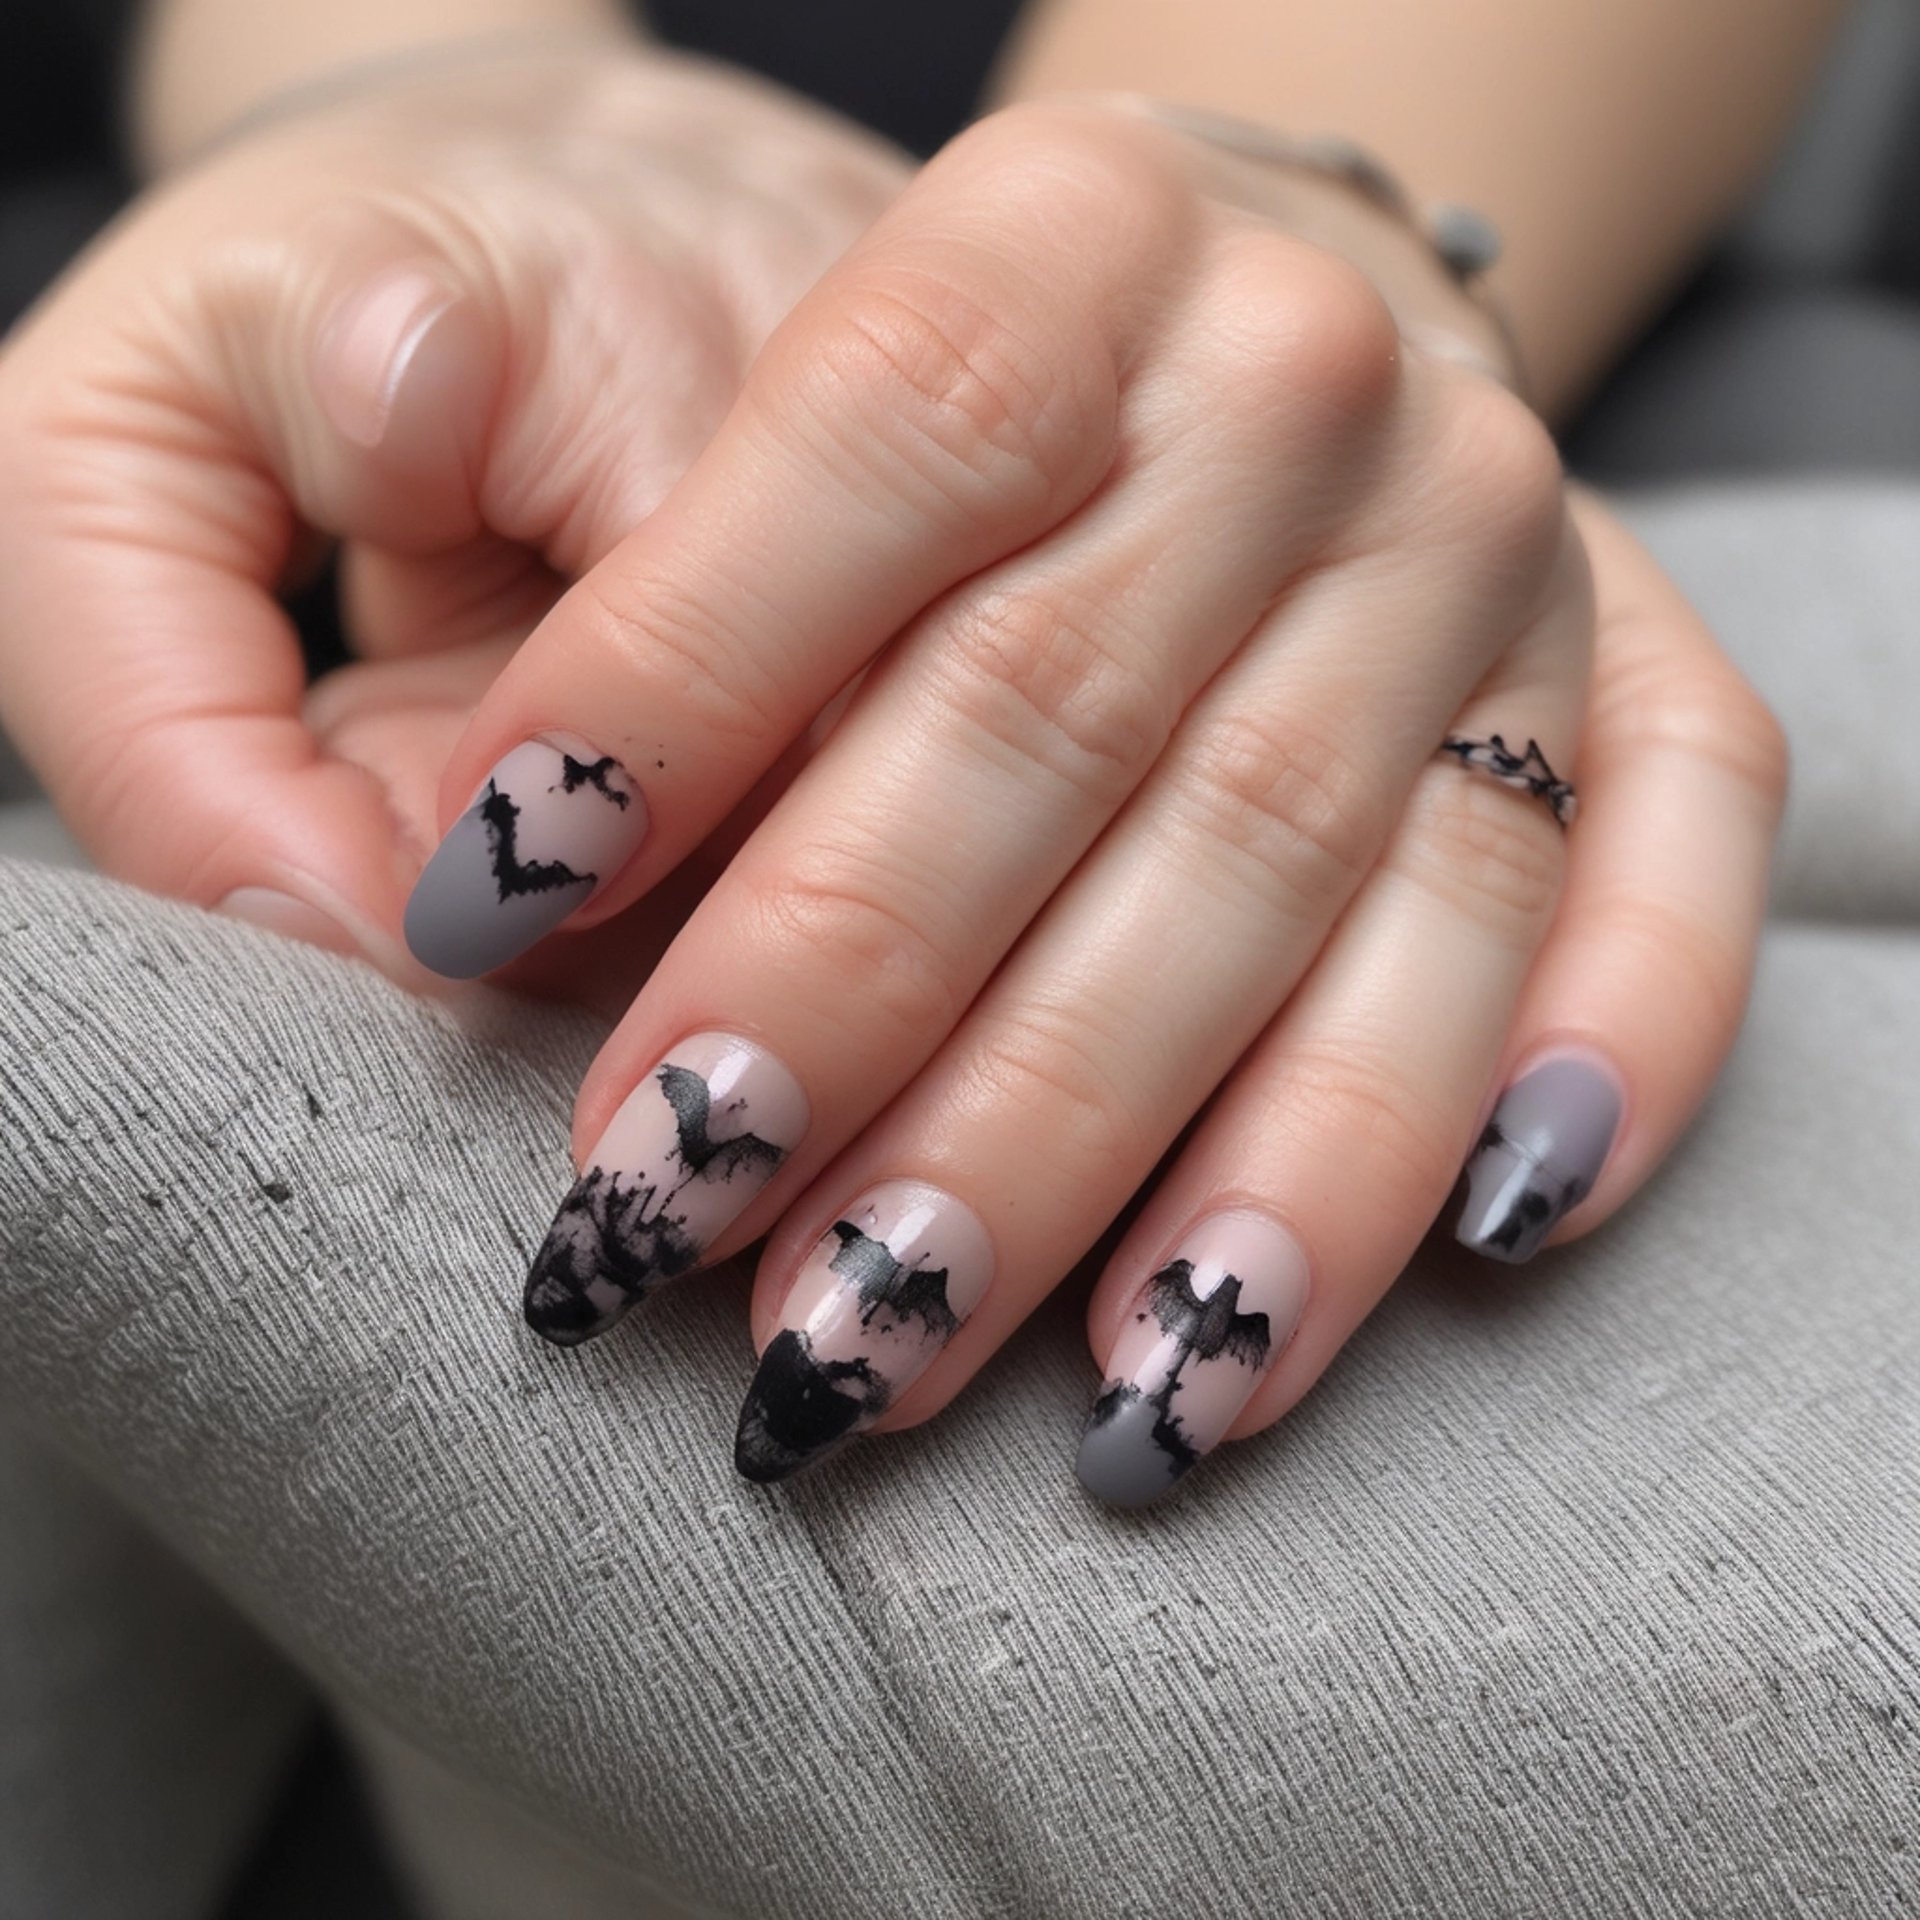
10. Tiny Bats Silhouette
The ultimate subtle spooky statement. This minimalist design is quick, easy, and provides just the right amount of Halloween charm for your daily life.
The Vibe: Simple & Stylish, Wearable Charm.
What You'll Need: Light gray, sheer pink, or periwinkle base polish (the lighter, the better!), black polish, and a very fine detail brush.
Step-by-Step:
Base: Apply two smooth coats of your chosen light base color. Cure/dry.
The Body: Dip your detail brush into black polish and create a tiny, upside-down triangle near the tip of your nail.
The Wings: On each side of the triangle, use the brush to create two small, slightly curved "wings" with a scalloped edge. Repeat on one or two nails per hand.
Seal It: Finish with your favorite top coat (glossy works great for maximum contrast).
Follow us
Disclaimer
This website contains affiliate links, which means that we may earn a commission if you make a purchase through those links, at no additional cost to you. We only recommend products and services that we believe will add value to our visitors